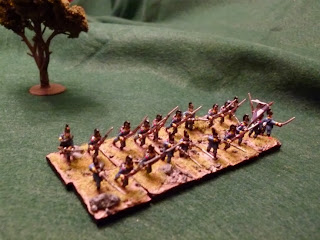
Wednesday, November 27, 2013

My Prussian Army Grows & Happy Turkey Day!

Continuing with my 1860s - 1870s Prussians, I just painted a unit of Württembergers and added them to my growing collection. It has become my realization that I need more standard bearers for each unit so I will be adding another to the Prussian Line Infantry as well as another for the Württembergers. The Württemberg command figures are on order as I did not have any.

A stroll in the French countryside perhaps?
Württemberg Line Infantry
Prussian Dragoons
Prussian Line Regiment
Prussian Artillery
Bavarian Line Regiment
Saxon Jager
There you have it, my work so far. I have been wanting to add some color to my Prussian Army but very few units (even amongst their allies) offer anything different than the usual pickelhaube and dark blue jacket. In my research, I found that Anhalt's uniforms of the period were quite different. They wore a medium green jacket with their regimental colors on their cuffs, collars and epaulets. The pants were in a dark grey with their regimental color running down their leg. The majority of sources show their pickelhaube with a silver spike and badge but a few others do show them both as gold. I will be painting the 93rd Anhalt Infantry Regiment with its pink regimental colors.

Anhaltisches Infanterie-Regiment Nr. 93
My next phase of the project is going to be to complete some Prussian Hussars, a couple more Prussian officers and standard bearers, as well as the Württemberg command base. Afterwards, I will begin painting some French for the period to give myself an opposing army. Thanks for looking and for all my fellow Americans, Happy Thanksgiving!

Sunday, November 17, 2013

The Reality of War: A Memoir of the Franco-Prussian War (1870-71)

It's been a while since I had an update but rest assured that I have not put down my brush. While simultaneously painting my Wurttemburg infantry and Prussian Hussars for the Franco-Prussian War, I have also been re-reading an excellent first hand account of the war by Leonce Patry called "The Reality of War: A Memoir of the Franco-Prussian War." It has been almost 8 years since I last read this book and I can say I did so back then with much more skimming for details on Metz rather than for enjoyment as it was for my military history class.


This memoir is an almost painful look into how inept the French officers were as it follows Leonce's adventures at part of the 6th Line Infantry Regiment. Leonce is a tricky Lieutenant recounting how he was just about to be placed into a rear echelon job but, through his wit, he ends up marching to the front to fight. While much of the start of the war is spent in tedium and dodging his pesky colonel, he provides rich detail of what the French encountered in their fighting. You might almost think the French would have had a shot had it not been for their terrible chain of command. Though I disagree with Leonce on this, I can certainly empathize with him and his youthful fervor.

The book is rich in historical significance as Leonce is an eyewitness to historical events such as Bazaine's surrender at Metz, the formation of Faidherbe's Army of the North, and even the retaking of Paris from the Communards. If you are as enthusiastic about the Franco-Prussian War as I am, this is a must for your bookshelf!

In other news, I have decided to take the Zedcember Pledge over at The Quick and the Zed Blog to paint 1 zombie or survivor figure per week for the month of December. I have nearly 1,000 unpainted zombies and survivors in 15mm so finding four that I want to paint is no problem. Stay tuned for Wurttemburgers, Hussars and ZOMBIES!

Tuesday, November 5, 2013

1862: A Dark Year (Longstreet AAR)

Continuing on with our Longstreet Campaign, we entered 1862 where I was soundly beaten by my friend Phil at his house. We rolled for meeting engagement and, unfortunately, the dice were heavily against me that night. My troops took a licking and met their breaking point.

My force after the first defeat in 1862.
Afterward, I scheduled a game at my place with our resident Master of Horse, DJ. I expected him to have lots of cavalry and I was not disappointed. He came into the battle with plenty of mounted troops and when it came time to roll for a scenario we were given another meeting engagement style map with some crops obscuring my artillery.

My Rebels (bottom) move up to entrench along the corn.
My first move was to sent up my troops to entrench along the corn and create a solid defensive position. My artillery was positioned along two corridors where they would get some possible shots on his advancing yankees. His cavalry immediately moved toward my flanks in hopes of drawing off some of my units to guard them. The maneuver was a good one as I indeed fell for the feint. With my Zouaves and cavalry tied up on the wings, his Heavy Rifles absolutely ripped my exposed artillery and cavalry to shreds.

Attempting to secure the flank only to be chewed by shell.
DJ, never one to turn down the gift of cavalry combat, received my Confederate charge on his men well. I defeated him just barely and forced him to remove a base and take 3 steps back.

The 4th Louisiana takes a bite out of the damned yankee cavalry!
Things were looking okay for me as I began to pull in my artillery after they took some losses and consolidated my defense. My well entrenched men in the cornfields made some successful volleys on the enemy while one of DJ's cavalry units got mired down on the left flank, allowing my Zouaves to chip away at them up for 3 straight turns. But then DJ played the "Confusion" card and forced my 1st Tennessee "Memphis" Regiment to advance from their dug in position and into the midst of a 2 larger regiments of blue devils. The entire regiment was destroyed in a single turn. How I hate that damn card!

The center cornfield is where the 1st TN got confused and rushed headlong into the yanks.
The battle was all but over at that point. We traded a few more punches and with a lucky roll of 6 by DJ, the game was over as I reached the breaking point. While I earned another Epic Point for my cavalry's heroic charge, it will take a victory to ensure a total Confederate victory in the campaign.

Force Roster after the completed battle and campaign cards.
Post Battle: I was lucky to finally get some rifled artillery as well as a new cavalry unit and some replacement infantry on the card draw. I was forced to take a second personality which turned out to be a personal physician. The physician card gives me immunity from "They Couldn't Hit An..." as well as another benefit which escapes me at the moment. The last card, "See the Elephant," allowed me to make my Zouaves into Veterans.

As for DJ, he was the real unlucky one in post battle. His largest and best unit was struck heavily with typhoid and reduced in half (I believe it went from 8 bases to 4 and then up another one to 5 with replacements). 

I'm not completely happy with my roster as I despise cavalry but the replacement artillery was desperately needed. Here's to hoping 1863 is a better year and, in the words of my figures, the south shall rise again!

Sunday, November 3, 2013

Bavarians & Saxons in 15mm

My compatriot's secret project is coming along well as I have submitted to him all the necessary research. At this point, it is all about the rules so we are going back and forth in emails on that subject to make sure they will fit the armies of the late 19th century. Inspired by the project, I have decided to finish painting up some 1870 Bavarians in 15mm I had started as well as painting up a Saxon Jäger.

LtoR: Bavarian Command (FPW36), Saxon Jäger (FPW50), & Bavarian Line Infantry
Old Glory Bavarians Skirmishing (FPW38)
I used a slightly darker Bavarian blue color to catch the faded look.
As I mentioned in the captions, these are all Old Glory figures that I have had sitting around for close to 3 or 4 years now. The only issue I have with the OG Bavarians is that the Command have epaulets on their shoulders and according to all the pictures I have seen of Bavarians in 1870, they did not have epaulets. Warfare in the Age of Steam, one of my favorite blogs, has some great plates showing Bavarian infantry in 1870. The Osprey on the Franco-Prussian War units of Prussia is also useful.

"Get up you fools! They are sculpting me with epaulets!"
The OG figures I did will be joining some unknown (UPDATE: Figures made by Minifigs. Info thanks to John Leahy over at TMP) 1870 Bavarians I had bought off eBay a while back that I stripped and repainted. The sculpts on those are far more accurate as they come with full kit and I wish I knew who made them. Downside of the eBay figures is that they only come in 1 pose (advancing). The OG figures come in several different poses.

Old Glory Bavarians (15mm)
  • Historical Accuracy: 7/10
  • Pose Quality: 8/10
  • Pose Number: 8/10
  • Sculpting: 8/10
  • Mould: 8/10
Overall, I am happy with the figures and how they painted up but there are some issues with them. The biggest issue is the sculpting around the shoulders. It almost seems as if the sculptor was unsure as to what to put there so on some poses you see hints of an epaulet while others have shoulder wings that are more like a single dot. This could be from the mould needing to be redone or even possibly just an awkward sculpt. The mysterious epaulets can be fixed with a hobby knife or file. I also like the look of full kit, which these figures lack. Some of the figures don't even have bayonet sheaths.

The Minifigs Bavarians from eBay.
As for the Saxon Jägers (FPW50), it doesn't look like OG15s carry them anymore sadly but you can get them from other distributors who have packs laying around. They are good sculpts and easy to paint as their uniforms were dark green jackets with black trousers (which is also a downside as any detail gets lost anyway). Next up are some Württemberg infantry, a mounted officer, some General Staff and another regiment of Prussians. Also a ton of basing!

Wednesday, October 30, 2013

Happy Halloween!

My wife and I would like to wish everyone who reads my blog a Happy Halloween! Thank you for your support, comments and advice in improving my miniatures.


Monday, October 21, 2013

Late 19th Cent. Prussians & Basing Test

A while ago I had started on a Franco-Prussian War project that I never completed sadly due to a waning interest when I realized nobody else really gamed it nor had interest in it (at least in my area). So, my OG Prussians sat patiently in a box waiting to be based for a future game. Recently, a friend has come up with an interesting idea for a game and now I get to use my Prussians for this super secret project! Not only was it a great moment to break them out but also a chance for me to test some new basing techniques.

Basing has always been a last concern for me really and a step that I rush through to field a quick army. I had made a mix of two different static flocks as well as some random stones which, after my base was covered with glue, my figures would be dipped into overnight. In the morning, I'd tap the excess off and blow on it to get the grass standing and I was done.

A typical base for me. Rock & Flock!
After doing some careful research, I decided to go with a basing method utilizing DryDex (something no homeowner is short of). The first step is to apply your painted figure (I just used super glue) and then after the glue is dry, apply the DryDex. Spread the DryDex around and don't be afraid of getting some on the figures or the edges of the base (I'll explain later). When the DryDex is on the base, it will be a pink color until it dries and then it will be white. WAIT! It isn't fully dry yet! If you don't give it adequate time to fully dry, you could end up leaving indents of finger prints or flaking off pieces. Once it is fully dry, go ahead and chip off any spikes or weird, unnatural formations with a plastic knife or other tool.

DryDex + Stones
Once the DryDex is set, put on any color stones you want. They will get painted over anyway. In my case, I used some really cheap craft store stones that come in all sizes and shapes. (I don't even remember where I bought them so don't ask.) Use a 50/50 mix of water and PVA glue over the stones and let the glue dry fully. Once the glue is dry, go ahead and apply whatever color you want for the soil. In my case, I used DecoArt Americana Mississippi Mud for my first layer. I then dry brushed a khaki over that.

Mississippi Mud, Khaki dry brush, and black stones.
I then highlighted the more interesting rock formations using some Reaper Dragon Black. Once that dried, I went over the stones with a coating of Reaper Armor Grey paint before hitting them with a dry brush of Reaper Granite Grey. From there, it was just some minor touch-ups and the flocking. For the flocking, I just put on some 50/50 watery glue and let it make some odd shapes before blowing on static grass made by Gale Force 9.

The final product.
Close up.

The cavalry.
The DryDex method proved to be a nice looking one but it is also extremely time consuming! No joke, I spent my entire weekend doing 20 infantry bases, 10 cavalry bases, and 3 artillery bases. Only tonight (Monday) was I able to really finish them by doing the black trim on the bases and adding in things like bushes and flowers. I still have another ~15 infantry bases before I am done with the beginning of the project. I will likely expand the army as the project goes on.

What do you think? Was the new basing method worth the time?

*UPDATE* I later realized I never explained why it is okay to get DryDex on the figures. It is easily removed with a damp q-tip. No mess, no fuss.

Sunday, October 13, 2013

Longstreet Campaign AAR (1861 - 1st Battle)

At our last club meeting in September, we played a very fun game of Sam Mustafa's Longstreet and decided that we would all like to do a campaign game. Starting yesterday, we put our forces into action with the first battle in 1861 pitting myself, Lord Ashram, and Rob (who commanded 2 brigades) against 4 formidable Union foes. When we rolled for the scenario, it came to the River Crossing.


After the terrain was placed, we had reduced their 4 easy river fords down to only one with terrain obstructions (forests, rocks, and hills) which was my brigade's task to defend on the far right flank. The Union forgot that they were able to place a river crossing rather than other pieces of terrain and only remembered after they had already placed 2 pieces so they added another ford which we promptly obstructed.

My Force Roster at the start of the battle.
My forces and Ashram's cavalry on the right flank guarding the objective and open ford.

Ashram's forces in the center and Rob's 2 brigades on the far left.
The battle was mostly focused on Rob's side where our friend John's union forces quickly engaged him from across the river in an attempt to weaken the Confederates for a crossing. It was a 4 hour long slug fest for them that resulted in big casualties for each side. In the center and on the right, Lord Ashram and I mostly bombarded the Union approach and chewed their forces up a bit. Not a single Union regiment would ever even get onto a river ford.

Slug fest on the left flank.
Rob and John's forces battling it out.
Where my forces did see action was in a cavalry engagement that did not go my way at all. It was the original intention of myself and Ashram to get in the rear of our enemy and then dismount for a flanking attack. The Union CiC came to the rescue of that flank though and played a card that allowed them to throw a swamp in front of our maneuvers.

*POOF* God damn magical felt swamp!
We were able to maneuver around the magical swamp with my 5th Texas Rangers going left and Ashram's cavalry going right. After a little horse dancing show, I had just drawn a card that would have extended the reach of my cavalry for a charge. As soon as it was my turn I was going to throw that bad boy down, make contact and win the day....that is until it was my foe's turn first and he played the same card.

See explanation below.
(1) I was hemmed in against the river, beaten in combat and forced into position 2. (2) The Union opened fire with a volley and, thankfully, they were terrible shots and missed. I was then forced back into position 1 in an attempt to retreat but was again charged. There, I lost 6 out of my 8 bases of cavalry before I was able to pull away to position 3.


The game was extremely fun and ended with the left flank having seen the majority of the action but a major Confederate victory as they neither took our position nor did we suffer too many casualties in comparison. Longstreet remains one of my favorite games to play and I look forward to my next engagement against my friend Phil which will take place in 1862. At the end of the battle, we had to do the Post Battle Process. I was promoted to II Eagles (Longstreet uses Eagles in replacement for the Union/Confederate ranks) and awarded 3 Epic Points. Drawing campaign cards proved to be a major coup for me as I received a new unit of infantry, cavalry, and artillery!

My new units: 2nd Texas Partisans, 3rd Alabama Lt. Horse & Southern Guard Artillery
The typhoid outbreak did hit all of us though and even though I recovered some units through rolling, I only later lost them to typhus. As Sam explains in the rules, while Civil War casualties are staggering, the vast majority of losses were caused by disease. I look forward to engaging my next opponent in a 1 on 1 game and updating everyone on what happens in 1862.